

How to Replace a Food Heat Lamp Bulb: Quick & Easy Tutorial
Food heat lamp bulbs require periodic replacement as their infrared output degrades over time, reducing warming performance and potentially creating food safety risks when food temperatures fall below safe holding thresholds. Understanding how to replace heat lamp bulbs correctly ensures that equipment returns to full operating capacity quickly and safely, minimising service disruptions in busy commercial kitchens and catering operations. This guide covers the bulb replacement process for the most common commercial heat lamp configurations, with step-by-step instructions that any trained staff member can follow safely.
Understanding Heat Lamp Bulb Types
Infrared Heat Lamp Elements
Commercial food heat lamps use specialised infrared heating elements rather than standard incandescent light bulbs. While they may appear similar to regular bulbs, infrared heating elements are designed specifically to emit infrared radiation for thermal effect rather than visible light. These elements operate at high temperatures to produce the infrared wavelengths that transfer heat energy to food surfaces below. Standard incandescent bulbs, halogen bulbs from retail lighting applications, and other non-infrared types should never be substituted, as they lack the appropriate emission characteristics and may create safety hazards when used in heat lamp applications.
Wattage and Voltage Specifications
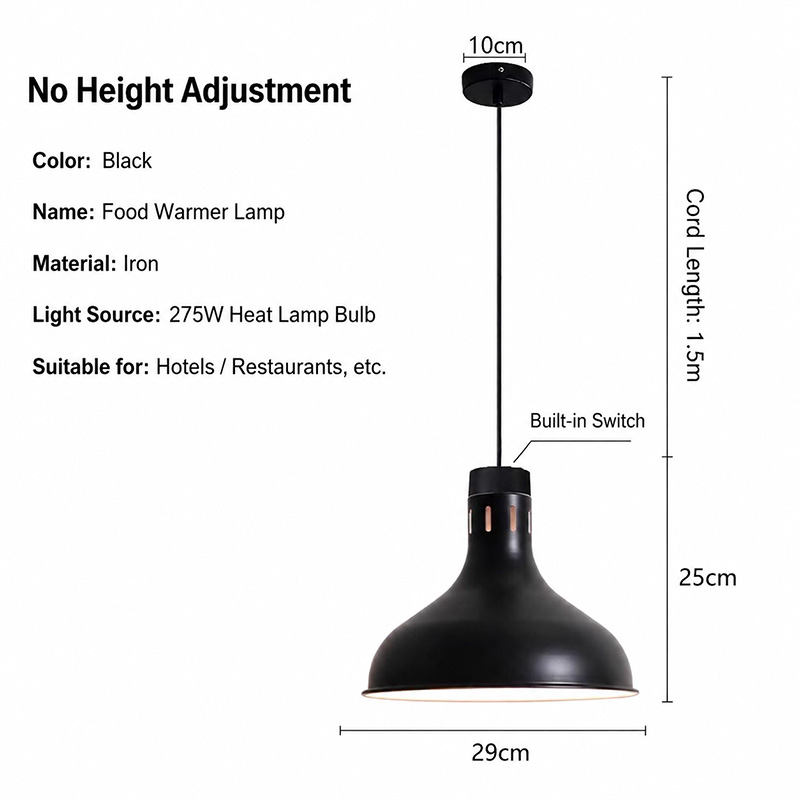
Replacement bulbs must match the exact specifications of the original equipment, including wattage, voltage, and physical base type. Heat lamp elements are rated for specific wattages that determine their thermal output and the coverage area they can effectively warm. Using a lower wattage replacement reduces warming capacity below design specifications, while a higher wattage replacement may create overheating risks and void equipment warranties. Common commercial heat lamp ratings include 100-watt, 150-watt, and 250-watt elements, with the specific rating determined by the lamp design and intended application.
Red Heat Versus Clear Heat Elements
Two primary types of infrared heat elements are available for commercial food service applications. Red heat elements feature a glass envelope with a red or amber coating that reduces visible light output while allowing infrared radiation to pass through. These elements are preferred in food service applications where the visible glow of the lamp is less important than the thermal effect. Clear heat elements provide slightly higher thermal efficiency but produce more visible light. Both types provide effective food warming when correctly specified for the application.
Safety Precautions Before Replacement
Power Isolation
Always isolate electrical power to the heat lamp before beginning any replacement procedure. Unplug portable units from their power outlets, ensuring that the plug is fully removed and not merely switched off. For fixed installations, switch off the dedicated circuit breaker and verify that the circuit is de-energised using an appropriate voltage tester before proceeding. Display a warning notice at the power switch to prevent accidental re-energisation while maintenance is in progress. Never rely on lamp switch position alone to indicate safe working conditions, as wiring faults could allow the lamp to energise unexpectedly.
Allowing Cooling Time
Heat lamp elements reach temperatures approaching 250 degrees Celsius during operation and require adequate cooling time before handling. After disconnecting power, wait at least forty-five minutes for the element and surrounding components to cool to safe handling temperatures. Elements that appear dark or unlit may still retain sufficient heat to cause severe burns. Never attempt to remove a hot element from its socket, as thermal shock can cause the glass to shatter, creating laceration hazards and scattering hot material.
Checking for Damage
Before replacing a seemingly failed element, check for other potential causes of lamp failure. Inspect the lamp socket for signs of corrosion, melting, or damage that may prevent proper element contact even with a new element installed. Check the power cord and all visible wiring connections for damage or deterioration. Verify that the power supply matches equipment specifications. These checks prevent the frustration and expense of installing a replacement element that cannot operate due to a different underlying fault.
Replacement Procedure for Freestanding Units
Removing the Old Element
Freestanding heat lamps such as the Stainless Steel Heat Lamp-BJ10 typically have accessible dome assemblies that allow element replacement without complete disassembly. Support the dome assembly while loosening the retaining hardware, which is usually a threaded collar, bayonet mount, or friction fit depending on the manufacturer design. Lower the dome carefully to a working height, taking care not to strain any attached wiring. The heat element is typically held in a ceramic or silicone socket rated for high temperature operation. Gently rock the element while pulling to release it from the socket, avoiding excessive force that could damage the socket.
Installing the Replacement
Handle replacement elements only by the base, avoiding contact with the glass envelope where skin oils can create hot spots that shorten element life. Align the element base with the socket configuration and push firmly until the element seats fully, typically indicated by a click or visible engagement of the locking mechanism. Do not force elements that do not seat easily, as misalignment can damage socket contacts. Restore power briefly to verify the element illuminates correctly before reassembling the dome, then disconnect power again for final dome replacement.
Reassembling the Unit
Reinstall the dome assembly by reversing the removal procedure, ensuring that all mounting hardware is properly secured and that wiring is not pinched or strained during reassembly. For height-adjustable units, check that the adjustment mechanism operates smoothly after reassembly. Restore power and verify normal operation, monitoring the new element over the first few hours of use for any signs of abnormal operation such as flickering, odours, or inadequate heating.
Replacement Procedure for Pendant and Ceiling Units
Working at Height
Pendant-mounted units such as the Ceiling-Mounted Rose Gold Buffet Heat Lamp require safe access equipment for replacement procedures, as the lamp heads are positioned at elevated heights. Use a stable platform ladder or purpose-built access equipment that provides safe working height with adequate reach to work comfortably. Never stand on chairs, crates, or other improvised platforms that could tip or collapse. Ensure that the work area below is clear of staff and equipment that could be injured if tools or components are dropped.
Accessing the Element
The pendant-mounted Ceiling-Mounted Rose Gold Buffet Heat Lamp may require lowering the lamp head to a workable height for element replacement, depending on the specific installation configuration. Where cord retractors are installed, lower the lamp head by releasing the cord grip and letting the cord pay out to a height that allows comfortable access. Support the lamp head before releasing any securing hardware to prevent it from falling. Element access procedures vary by manufacturer; consult the equipment documentation for specific instructions for your model.
Verifying CE Certification Compliance
The Ceiling-Mounted Rose Gold Buffet Heat Lamp carries CE certification for European market compliance, indicating that replacement elements should meet the specifications established during the original certification process. Use only replacement elements sourced from the manufacturer or authorised distributors to maintain certification compliance. Elements from unknown sources may not meet the electrical safety and performance specifications required by the certification, creating potential liability issues for commercial operators.
Replacement for Multi-Head Configurations
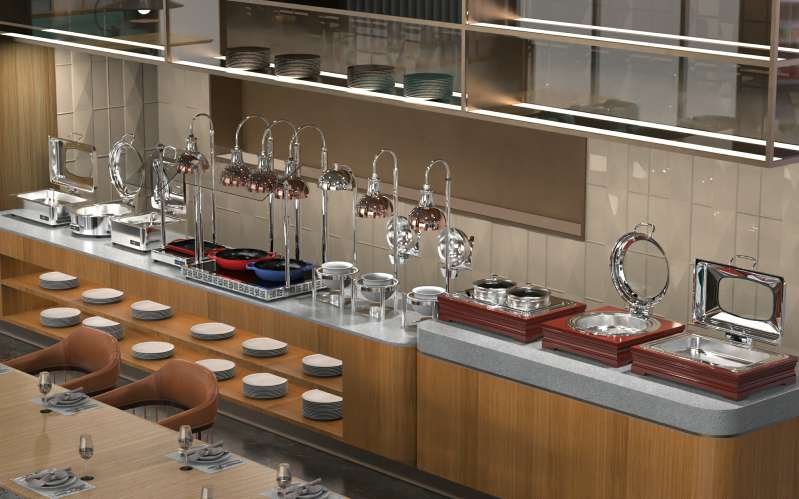
Three-Head Station Units
Multi-head gantry configurations such as the Three-Head Rose Gold Buffet Heat Lamp Station require element replacement on each head individually, with attention to identifying which specific head requires replacement versus overall performance issues that may affect multiple heads. The linear arrangement of three lamp heads over the warming surface means that each head serves a defined zone of the display. Selective replacement of only the underperforming head saves cost compared to replacing all elements, while ensuring that the remaining heads are still providing effective warming in their respective zones.
Synchronised Replacement Strategy
Rather than waiting for individual element failures, many operators adopt a preventive replacement strategy that replaces all elements on multi-head units at the same service interval. This approach reduces the likelihood of uneven warming across the display where some heads are providing full output while others have degraded elements. Documenting element age and replacement dates helps establish the service interval appropriate for your specific usage patterns, balancing replacement cost against the risk of unexpected failures between scheduled maintenance.
Troubleshooting After Replacement
New Element Not Illuminating
If a newly installed element fails to illuminate, verify that power is reaching the lamp by checking circuit breakers, GFCI outlets if installed, and any built-in thermal cutouts that may have triggered. Confirm that the element is fully seated in its socket, rocking it gently to verify contact. Test the socket with a known working element if available. Persistent non-operation indicates a socket or wiring fault that requires qualified electrician attention before the lamp returns to service.
Inadequate Heat Output After Replacement
New elements should produce visible infrared glow immediately upon energisation and reach operating temperature within a few minutes. If the replacement element illuminates but produces noticeably less heat than expected, verify that the replacement wattage matches the original specification. Check for contamination on the dome interior that may be blocking infrared radiation, as heavy grease accumulation on reflective surfaces significantly reduces warming efficiency. Clean domes before concluding that the replacement element is faulty.
Flickering or Intermittent Operation
Flickering elements indicate an intermittent electrical connection that requires investigation before continued use. Check that the element is fully seated in its socket and that socket contacts are clean and undamaged. Examine the power cord and plug for signs of damage that may create intermittent contact. Flickering should not be dismissed as a minor inconvenience, as arcing at poor connections creates fire hazards and will cause rapid element failure.
Preventive Maintenance Schedule
Element Life Expectancy
Commercial heat lamp elements typically provide between 3,000 and 5,000 hours of effective service under normal operating conditions. Actual element life depends on the number of operating hours, ambient temperature conditions, vibration levels, and how frequently units are switched on and off. Establishing a replacement schedule based on accumulated operating hours rather than waiting for visible degradation ensures consistent performance and reduces the risk of unexpected failures during busy service periods.
Keeping Spare Elements in Stock
Maintaining an inventory of spare elements appropriate to your equipment types ensures that replacements can be completed without delay when needed. Stock at least one spare element for each heat lamp model in regular operation, stored in original packaging that protects elements from damage and contamination. For large operations with multiple units, consider keeping a spare set of elements for each model rather than single units, allowing for multiple simultaneous failures or continued operation during extended repair times.
Professional Servicing Options
When to Call a Technician
While element replacement is within the capability of trained operators, any work involving the electrical system beyond element and cord replacement should be performed by qualified electricians. Signs that professional service is needed include melted or scorched sockets, damaged junction boxes, wiring insulation deterioration, and any situation where the fault cause is not clearly identifiable. Safety should never be compromised to save service call costs.
Annual Professional Inspections
Scheduling annual professional inspection of heat lamp equipment ensures that electrical systems and structural components are checked by qualified personnel even when operators do not identify specific problems. Professional inspections can identify developing issues before they cause failures, verify that electrical connections remain secure, and confirm that equipment remains safe for continued operation. Documenting professional inspections supports food safety audit compliance and demonstrates due diligence in equipment maintenance.
Conclusion
Heat lamp bulb replacement is a straightforward maintenance task that trained staff can complete safely when proper procedures are followed. The key steps are power isolation, adequate cooling time, correct element selection matching original specifications, proper handling of new elements, and verification testing before returning equipment to service. Freestanding units like the Stainless Steel Heat Lamp-BJ10 offer straightforward access for element replacement, while pendant-mounted units like the Ceiling-Mounted Rose Gold Buffet Heat Lamp require appropriate access equipment and may need the lamp head lowered for comfortable working height. Multi-head configurations like the Three-Head Rose Gold Buffet Heat Lamp Station allow selective replacement of individual underperforming heads or preventive replacement of all heads at a scheduled service interval. Maintaining spare elements in stock and establishing a preventive replacement schedule based on operating hours rather than visible failure ensures consistent equipment performance throughout the service lifecycle of commercial heat lamp installations.
Featured Products
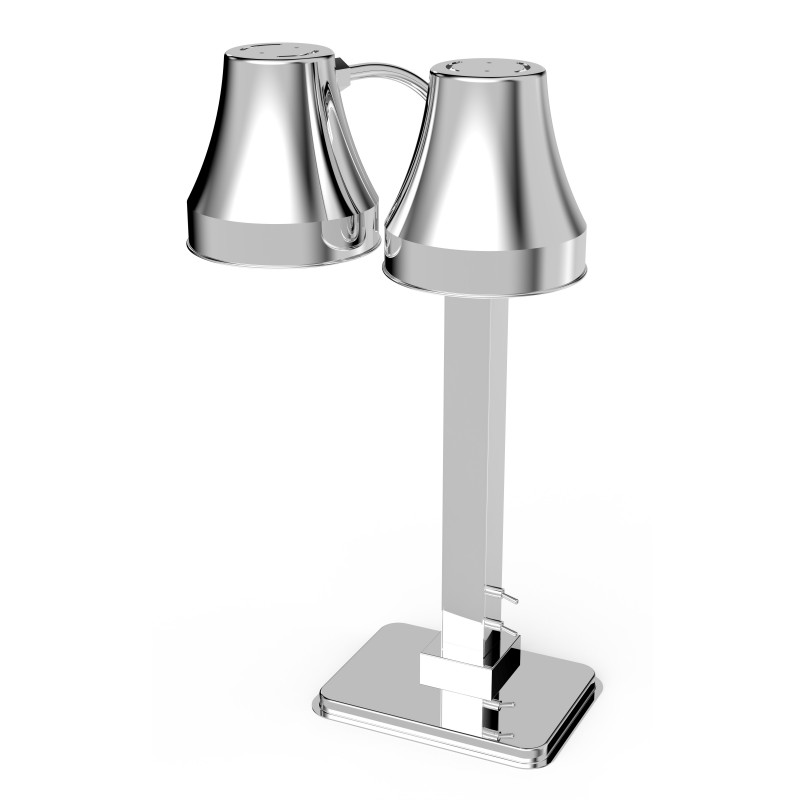
Stainless Steel Heat Lamp-BJ10
BAVA Stainless Steel Heat Lamp BJ10 Series. Freestanding countertop design with polished mirror SS, bell dome shade, height-adjustable post, weighted base. Available in single-head (BJ10/BJ101) and dual-head (BJ102). CE certified.
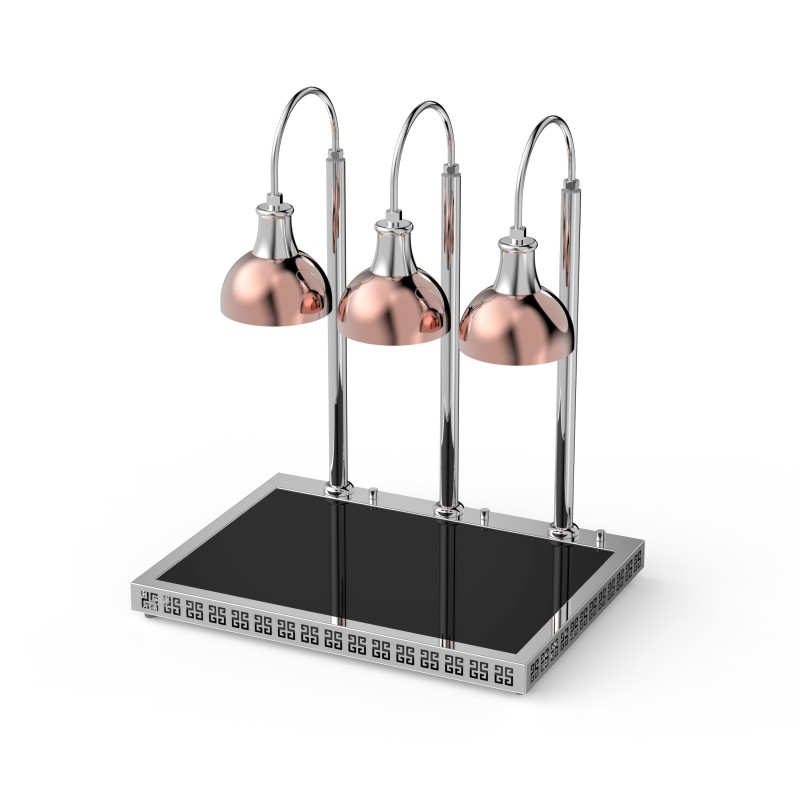
Three-Head Rose Gold Buffet Heat Lamp Station
BAVA Three-Head Rose Gold Buffet Heat Lamp Station. Three rose gold dome lamps in linear arrangement over black glass warming surface. Greek key decorative base pattern. BJ663T adds adjustable glass shelf. Premium hotel buffet design. CE certified.
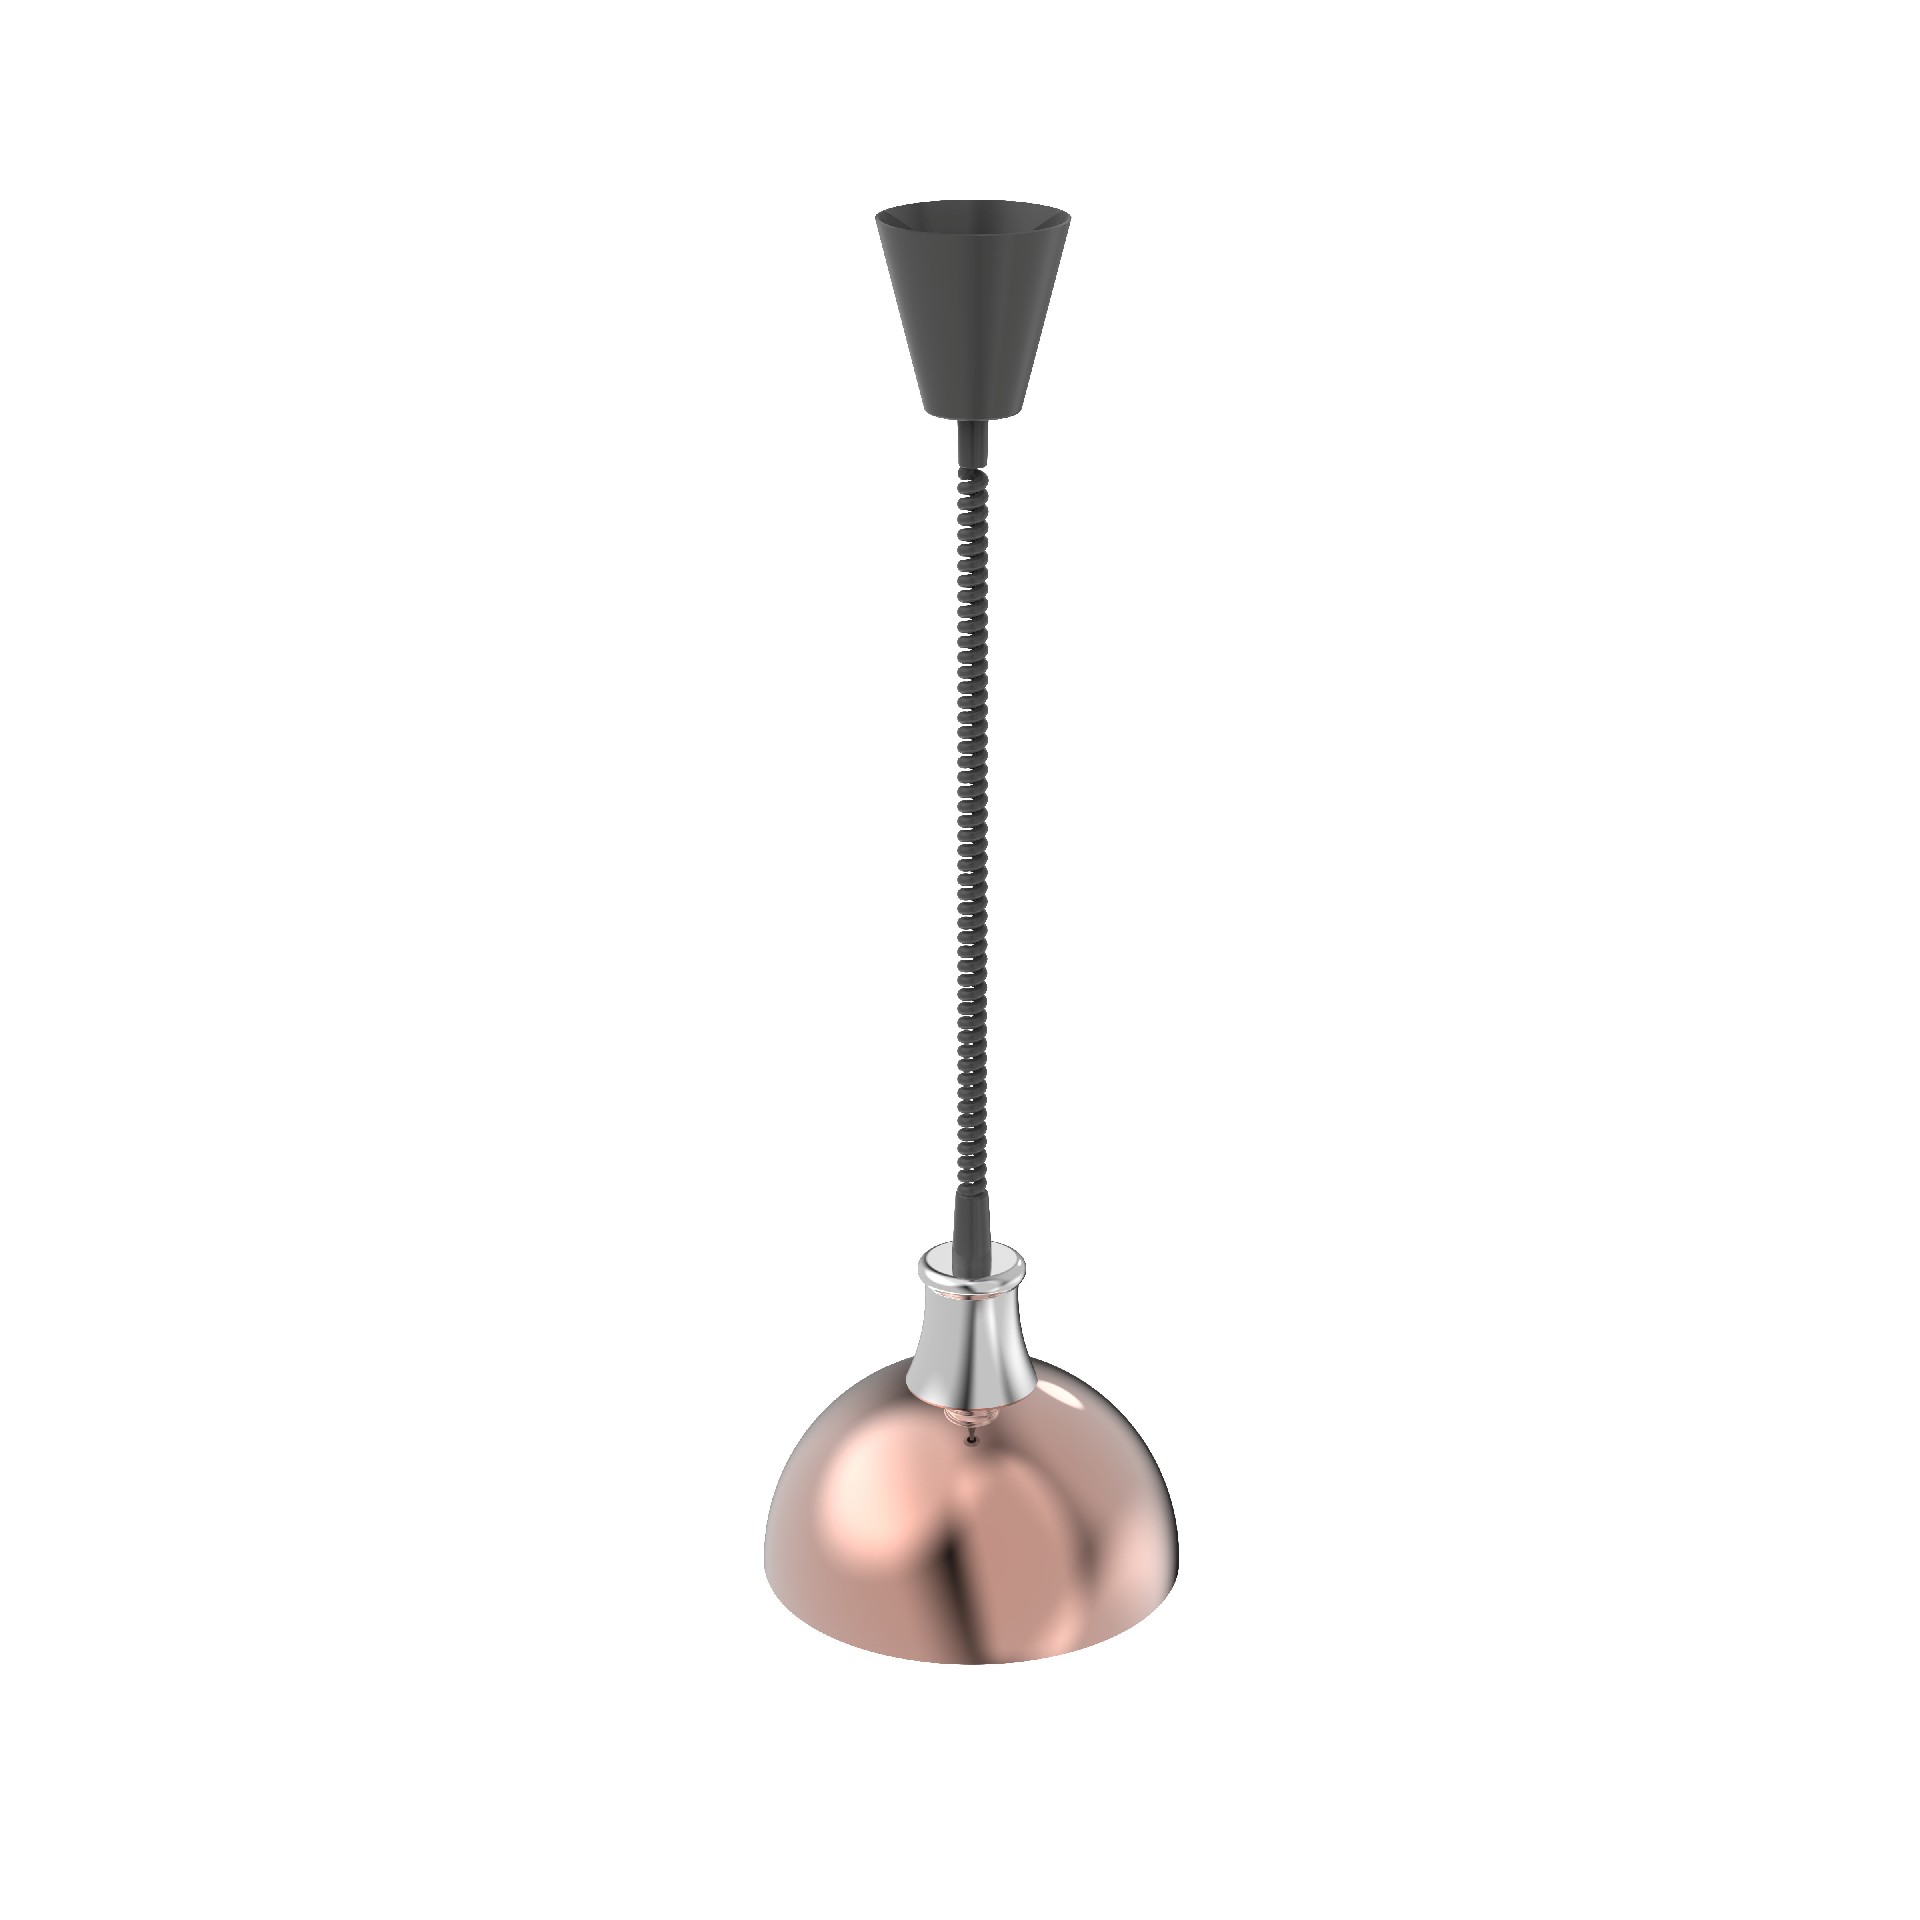
Ceiling-Mounted Rose Gold Buffet Heat Lamp
BAVA Ceiling-Mounted Rose Gold Buffet Heat Lamp. Single-head pendant lamp with rose gold dome, coiled cord height adjustment, matte black canopy. Models BJ1001/BJ1002. CE certified. Ideal for hotel buffets and upscale catering.
Related Articles

Electric Buffet Warmer with Adjustable Thermostat for Restaurants
Discover the best Electric Buffet Warmer with Adjustable Thermostat for Restaurants solutions. Real ...
Mini Chafing Dish for Breakfast Buffet & Condiment Stations
Discover the best Mini Chafing Dish for Breakfast Buffet & Condiment Stations solutions. Real case s...

9QT Extra-Large Chafing Dish for Large-Scale Banquet Events
Discover the best 9QT Extra-Large Chafing Dish for Large-Scale Banquet Events solutions. Real case s...

Wall-Mounted Buffet Stove for Space-Saving Kitchen Layouts
Discover the best Wall-Mounted Buffet Stove for Space-Saving Kitchen Layouts solutions. Real case st...

Stainless Steel Food Warmer for Supermarket Deli Departments
Discover the best Stainless Steel Food Warmer for Supermarket Deli Departments solutions. Real case ...
Commercial Chafer Dish with Temperature Control for Food Safety
Discover the best Commercial Chafer Dish with Temperature Control for Food Safety solutions. Real ca...